Error code C2146 is a common Microsoft Visual C error code. This error code happens when the compiler is unable to find a matching token. This can happen when the wrong character is used, or when the character is missing altogether.
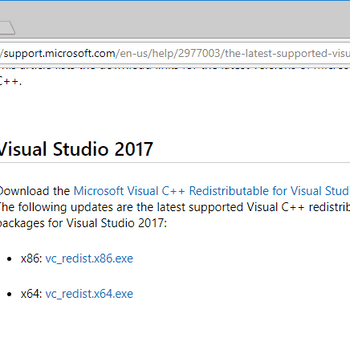
![Microsoft Visual C++ Redistributable Packages]() WindowsMSVCP140.dll is MissingMSVCP140.dll is Missing is an error that may occur when you try to launch either a game or a program on your computer.
WindowsMSVCP140.dll is MissingMSVCP140.dll is Missing is an error that may occur when you try to launch either a game or a program on your computer.![Disgruntled angry businesswoman arguing on cell phone sitting at]() Microsoft Visual CApi-ms-win-crt-runtime-l1-1-0.dll is missingApi-ms-win-crt-runtime-l1-1-0.dll is missing is an error that may occur when trying to open a program or file on your Windows computer but you are unable to. The api-ms-win-crt-runtime-l1-1-0.dll file is part of Microsoft C++ Redistributable for Viral Studio 2015. If the software is missing, incompatible or corrupted, the error may occur.
Microsoft Visual CApi-ms-win-crt-runtime-l1-1-0.dll is missingApi-ms-win-crt-runtime-l1-1-0.dll is missing is an error that may occur when trying to open a program or file on your Windows computer but you are unable to. The api-ms-win-crt-runtime-l1-1-0.dll file is part of Microsoft C++ Redistributable for Viral Studio 2015. If the software is missing, incompatible or corrupted, the error may occur.
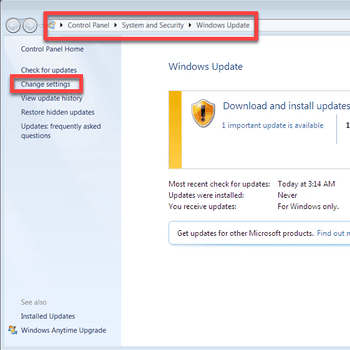
![Update Windows]() Microsoft Visual C0x80240017 unspecified error0x80240017 unspecified error is an error that usually appears during the installation of Visual C++ and it means that it wasn't installed properly.
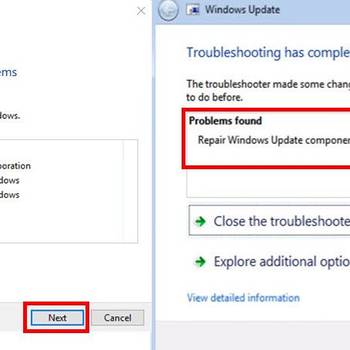
Microsoft Visual C0x80240017 unspecified error0x80240017 unspecified error is an error that usually appears during the installation of Visual C++ and it means that it wasn't installed properly.![Use Windows Update Troubleshooter]() Microsoft Visual CWindows Update error code 0x80240017Error code 0x80240017 in Windows Update may occur when you're installing Windows Update files and encounter an error related to Microsoft Visual C++.
Microsoft Visual CWindows Update error code 0x80240017Error code 0x80240017 in Windows Update may occur when you're installing Windows Update files and encounter an error related to Microsoft Visual C++.
1. Try reinstalling the program
- Go to the Microsoft website and type in "Visual C reinstall" into the search bar.
- On the Microsoft website, click on the link that says "Visual C reinstall: step-by-step instructions."
- Read the instructions carefully and follow them step-by-step.
- When you have finished reinstalling the program, try running it again. If the problem has not been fixed, go to step 5.
- If the problem has been fixed, then you can delete the old program files and install the new program files.
2. Make sure that all dependencies are installed
- Open a command prompt and change directory to the folder where the project files are located.
- Execute the following command to install the Microsoft Visual C++ 2005 Redistributable package: msiexec /package {RedistributablePackagePath}
- Execute the following command to install the Microsoft Visual C++ 2008 Redistributable package: msiexec /package {RedistributablePackagePath}
- If the project requires the Microsoft Visual C++ 2010 Redistributable package, execute the following command: msiexec /package {RedistributablePackagePath}
- Close the command prompt.
- Open the project file in a text editor.
- Locate the following line of code: #include "stdafx.h"
- Change the line to include the following path: #include "Microsoft.VC80.CRT.h"
- Save the file.
- Double-click the project to launch it.
- If the project fails to compile, verify that all the required dependencies are installed.
- If the project still fails to compile, verify that the Visual C++ libraries are installed.
- If the project still fails to compile, verify that the project files are located in the correct directory.
- Verify that the project files are located in the correct directory and that the required dependencies are installed.
- If the project still fails to compile, verify that the project files are located in the correct directory and that the Microsoft Visual C++ 2010 Redistributable package is installed.
3. Try running the program in compatibility mode
To run the program in compatibility mode, follow these steps:
- On your computer, open the folder where the program is located.
- Double-click the program.
- If the program asks if you want to run it in compatibility mode, click Yes.
- If the program crashes or does not work correctly, try running it in compatibility mode again.
4. Make sure that you have the latest service pack installed
- Go to the Microsoft website and type in “service pack” in the search bar.
- Click on the “See All Results” link and then select the “Service Packs” option.
- Look for the “Service Pack for Microsoft Visual C++ 2005” and click on the link to download the service pack.
- Run the service pack installer and follow the on-screen instructions.
- After the installation is complete, restart your computer.
- Check for any new error messages that may have occurred as a result of the service pack installation.
- If the problem has not been resolved, go back to the Microsoft website and type in “Visual C++” in the search bar.
- Select the “Visual C++” option from the list of results and click on the link to download the latest service pack.
- Run the service pack installer and follow the on-screen instructions.
- After the installation is complete, restart your computer.
5. Try repairing the installation of Microsoft Visual C
If you are experiencing a Microsoft Visual C error code, you can try repairing the installation. Some common repair steps are as follows:
- Try uninstalling and reinstalling Microsoft Visual C.
- Try running Microsoft Visual C as an administrator.
- Try repairing Microsoft Visual C using the Microsoft Visual C Installer.
Still not working? maybe try one of these options:
- Try using a different compiler.
- Try uninstalling and then reinstalling Microsoft Visual C.
- Try running the program as an administrator.


